If you’re handy, you might want to see what going on inside your hair dryer when it is broken. And the most important thing is to remove the internal heating element without damaging the wires and other components.
Luckily, most old-school traditional handheld hair dryers’ heating element can be removed in the same way (I’m talking about those hair dryers that have a big oval body). Check out how to remove the heating element from your hair dryer and it’s simple and easy.
Note that it’s not recommended to take off the heating elements from expensive models like Dyson or T3, they might have different component arrangements and they have an official support department for fixing and replacement.
Before you start
Before you attempt to remove the heating element from your hair dryer, make sure the dryer is unplugged and turned off. It’s for protecting the internal electronics and wires. Most importantly, you won’t be in great danger of electrical shock and burning.
Tools Needed to Remove the Heating Element
- Philip Screwdriver
- Tweezer (Optional)
- Spudger (Optional)
Removing the Heating Element: Regular Handheld Dryer
If your hair dryer looks like this, there’re usually two screws on the back of the handle that can be removed by a screwdriver.
After removing the screws, you can gently take off the back cover of your dryer. Don’t open the cover by force because there might be plastic snaps inside, you can try to use a spudger to pry off the back cover.
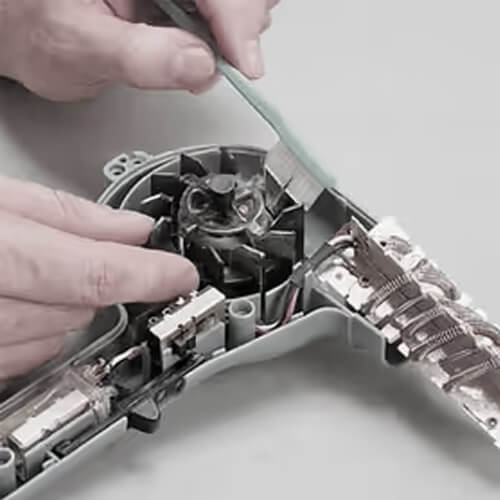
Now, you should see the propeller and the fan motor on the back of your dryer, the drying motor is usually fixed with 2 screws. Lay your dryer down and carefully remove the screws. (You should not hold the dryer vertically while removing the screws, the motor can easily fall from the dryer and you might break the wires that power the motor.)
Then you can slowly pull the drying motor to get the motor out off the dryer’s cover, don’t do it brutally since we don’t want to damage the motor and wires. Note that you can’t completely remove the motor from the dryer because the wires are still connected, so just make sure you place it safely next to the dryer on a table.
Next, the heating element is visible after you take the motor out, you can easily remove it with your hands. If you can’t reach the heating element, a tweezer can help you with that.
If you are going to fix the heating element at home, this video may help.
Removing the Heating Element: Vintage Handheld Dryer
For people who have an old-school retro hair dryer, it’s even simpler to remove the heating element.
First off, take off all the attachments such as nozzles or concentrators.
A vintage hair dryer’s exterior casing can be removed by removing the screws on the side of the handle. And you can see the whole internal structure after taking off the cover.

The heating element is on the front end of the dryer, if you see a mental nozzle housing, remove it first. And then you can lift the heating element up to remove it, don’t break the wires while doing it.
If you want to how to replace a vintage dryer’s heating element, here is the tutorial.

